
A quick tutorial on how to use Github Pages to create a static website -
Free templates included
In this guide, you’ll create your own resume-website in less than five minutes, for free, without having to code. The 2 templates included are CC BY-NC 4.0 licensed, which means you can use them for your portfolio, website and resume! The end-website and resume will look like this: (with the templates provided)
First step - Setting up a Github account
First of all, you’ll need a Github-account to upload your files. Github is a repository hosting service, which is being used by mostly anyone who works in the Software Industry. You can find loads of amazing software- and even designprojects on Github, where people participate and share their code, design, documents and knowledge. By setting up your account and uploading your first files you’ll probably become familiar with Github really fast, so you can use it for your future projects as well, even though you might be overwhelmed by the ui at first sight.
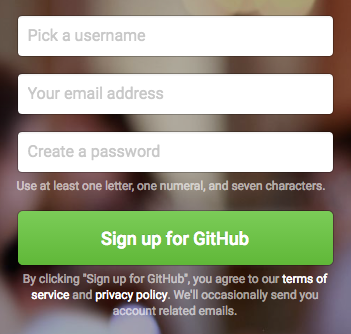
Go to https://github.com and create your free account – if you’re a student, you can even get the free student pack (https://education.github.com/pack), which gives you a bundle of useful products for free, as long as you’re a student.
Second step - customizing your Resume - template and exporting your photo
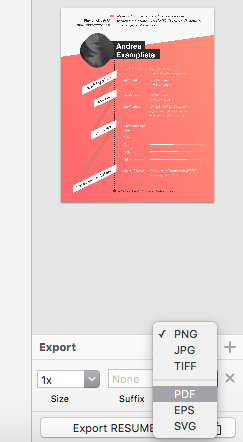
Open the resume-file in Sketch. Sketch is a professional vector design program, like Illustrator that allows you to create and export design assets fast and pixel-perfect. If you don’t have sketch yet, you can simply download the trial-version at Once you installed it, simply fill in your information that you want your new resume to display. Click on the artboard and export your resume as a PDF: (For convenience, name it resume.pdf)
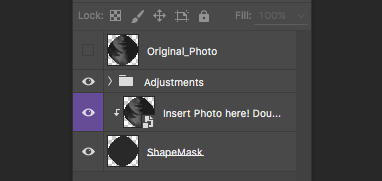
Next, open the Photo.psd file in Photoshop and double click on the highlighted smart-object layer. Insert a photo of yours in the opened tab and click save (CMD + S). Afterwards, go back to the main photoshop file and save your new picture as photo.png (You might have to overwrite the already existing one).
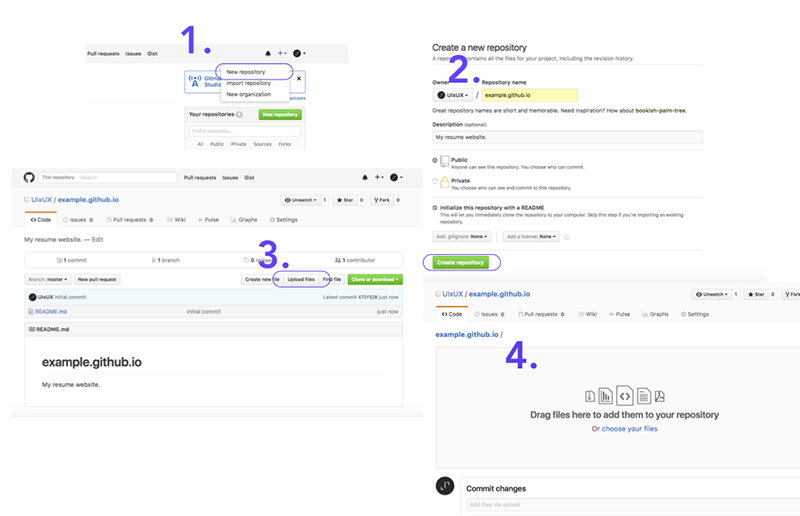
Third step - uploading your files on Github
Next, log in to your account again and create a repository where you’re going to upload your files. Name your repository like this: your //name.github.io . Congrats – Your first project is online!
After that, click on “Upload files”. By just “drag and dropping” your files, you can transfer your files immediately. Drag all files but the sketch-file into the “upload”-field. If you want to give your “commit” a description, you can do it now. Afterwards, click “commit changes”. Boom! Your site is on the web!
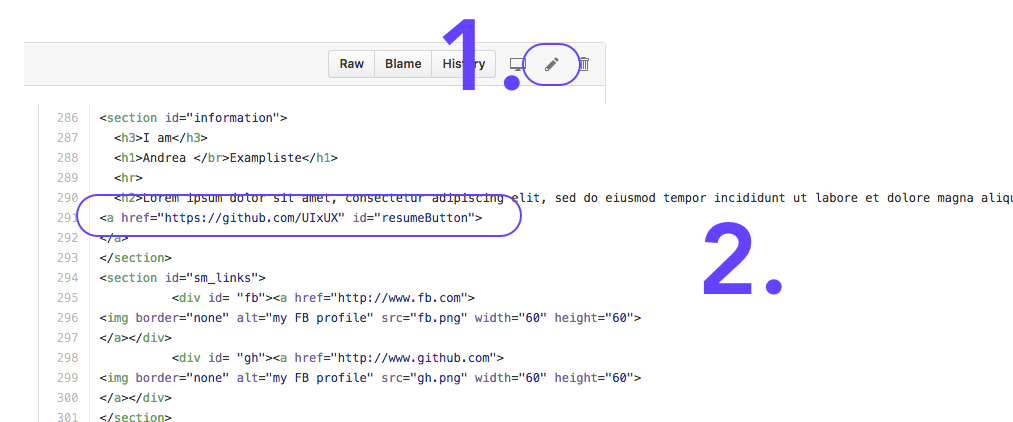
Fourth step - customizing your website
Open on the index.html file and click on the “edit”-pen-symbol in the right corner. We’ll now edit the site to display your profile information.
First, edit the tags in <head>, such as the <title> according to your preference. Next, scroll down to the <body>-section where you’re going to change the header-tags:
Enter your name in <h1>, your short profile-information in <h2> and the links to your social media profiles in the section id=“sm_links”. Feel free to change the social media buttons to your preference – buttons for behance, dribbble and linkedin are also included in the folder.
Lastly, change the href-Parameter for the “resumeButton” to the destination of your resume.pdf – file, so the user of your site can download your resume-file at the click of a button. If you previously saved your pdf-file as resume.pdf, just type in exactly that name.
It should look like this: <a href=“resume.pdf” id=“resumeButton” download>
Click commit changes.
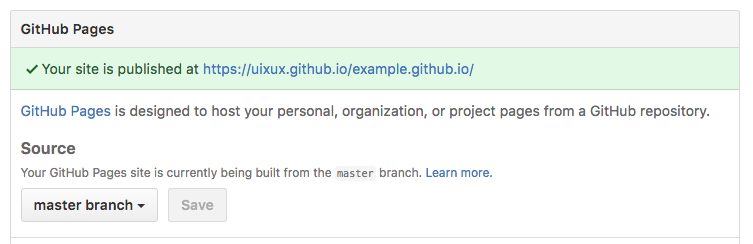
Fifth and final step - Edit your repo settings
Go to the main page of your repository again and click on “Settings”. In the Settings-menu, scroll down to “Github Pages”, click on Source – “none”, choose “Master branch” and save. Voila! Your page is up and running at https://github.com/YOURNAME/yourreponame.github.io .
Optional Step - Get your very own domain for your site
If you have a custom domain, you can simply enter it in the Settings at “Github Pages – Custom Domain”. You can buy your own domain at various name hosting companies for as low as 88 Cents.

